Half-Kneeling Landmine Press Setup: Knee Position, Grip and Form
A stable stance, comfortable grip and well-placed bar can make the half-kneeling landmine press easier to control. Setup varies by body and equipment.
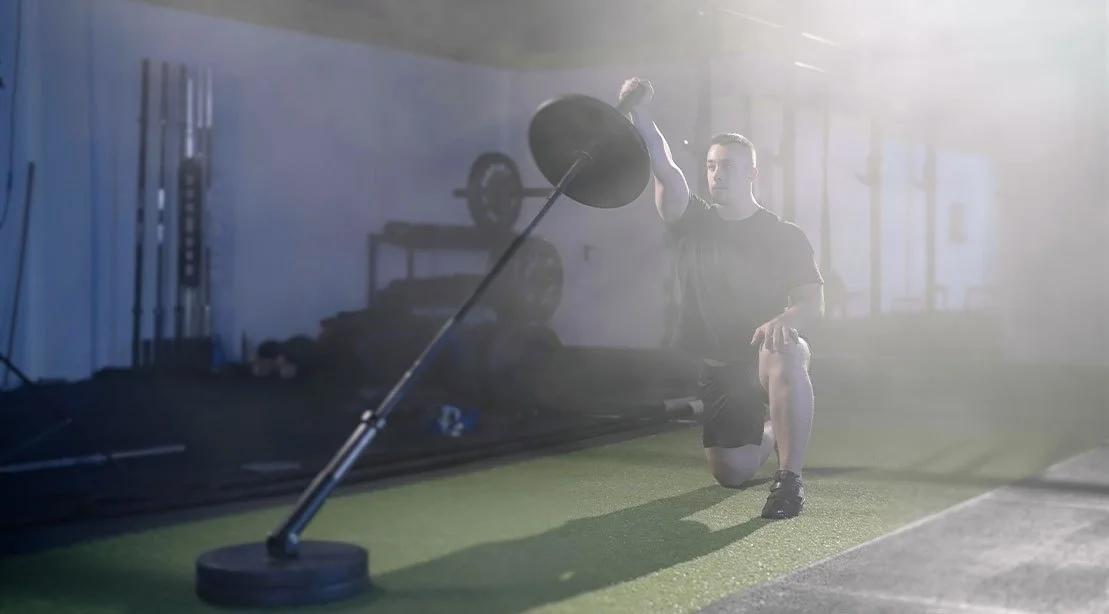
The half-kneeling landmine press can feel unstable or awkward when the bar starts too close, the grip strains the wrist, or the body isn’t braced. A few setup adjustments help create a steadier position before the first repetition. The right arrangement depends on your proportions, hand size and the landmine attachment, so treat these points as a guide and adjust until you can stay upright and in control.
The exercise uses one knee on the floor while the opposite foot stays planted in front. That narrower support base asks the legs, hips and trunk to help steady the body as one arm presses the angled bar upward. Setup matters because reaching, leaning or letting the torso rotate can make the movement harder to control.
Choose a knee position
For a right-arm press, there are two common arrangements. In the contralateral setup, the right knee is down and the left foot is forward. In the ipsilateral setup, the left knee is down and the right foot is forward. Both can work, but they create different demands on balance and trunk control.
The contralateral arrangement is a useful starting point. It can let the pressing shoulder move more freely and recruit the hip on the kneeling side to help stabilize the body. The ipsilateral position places the opposite arm and leg forward; this creates a diagonal challenge that asks you to resist turning as you press. Try each with a manageable load and notice which lets you press smoothly without twisting or shifting your weight.
Build a steady kneeling base
Set your front foot so its ankle sits roughly below the knee. Place the back knee below the hip, rather than stretching that leg far behind you. Leave some side-to-side space between the front foot and the kneeling knee, as if your legs were on two parallel tracks. A very narrow stance can make it harder to resist rotation.
Keep your hips level and facing forward. Lightly tighten the glute on the side of the down knee, and feel the whole front foot against the floor. These small points of contact help you create tension through the lower body without leaning or bracing excessively. A useful reminder is to keep the hips and shoulders square throughout the setup.
Pick a grip that lets the wrist stay comfortable
Depending on your hand size and the thickness of the bar sleeve, you can cup the end of the bar in your palm and wrap your fingers around it, or hold the sleeve itself. With a sleeve grip, your thumb can sit at the bar’s end or wrap around alongside your fingers. The source demonstrates a grip option in this short video.
Whichever grip you choose, hold the bar securely and keep the wrist as straight as you comfortably can, aligned over the forearm. The grip should give you control without forcing the wrist into an uncomfortable angle. If one option feels awkward before the repetition begins, try the other rather than forcing your hand around a thick sleeve. Think of keeping your knuckles directed upward and your wrist stacked over your forearm.
Find your distance and starting position
Kneel close enough that you can hold the bar without reaching, while leaving enough room for it to sit slightly in front of your working shoulder. If the bar crowds your arm or makes it difficult to position your elbow, shift a little farther away. If you have to lean or stretch to reach it, move closer.
Once you have the bar, keep your torso upright and your rib cage positioned over your hips. The elbow should sit below and slightly in front of the hand, with the forearm following the bar’s angled path. Set the shoulder comfortably down without forcibly pulling it backward, and keep the chest lifted. These adjustments should feel controlled; you shouldn’t need to arch your lower back to make space for the bar.
Brace before each repetition
Before pressing, take a breath into your abdomen and tighten your core. Keep your hips and shoulders facing forward, maintain pressure through the front foot, and lightly engage the glute on the kneeling side. The aim is to create steady whole-body tension so the arm has a stable base. Keep your ribs over your hips as you begin the movement.
If your lower back arches or your ribs flare before the first repetition, reassess your distance from the attachment and your body position. Kneeling too close can crowd the arm and encourage you to compensate through your back. Adjust your stance and bar position until you can remain tall without straining.
Quick setup check
- Choose the knee arrangement that lets you press smoothly and remain square.
- Keep the front ankle below the knee and the down knee below the hip.
- Leave enough width between your legs to feel steady.
- Use a secure grip that allows a comfortable, stacked wrist.
- Position the bar just in front of the working shoulder, without reaching or feeling crowded.
- Keep the elbow under and slightly ahead of the hand.
- Set your shoulder comfortably, keep your chest lifted and stack your ribs over your hips.
- Breathe, brace and lightly engage the glute on the kneeling side before pressing.
Common setup problems
Too close or too far: Being too close can crowd the shoulder and make the elbow position awkward. Being too far can prompt you to reach or lean. Adjust until you can support the bar while staying upright.
An uncomfortable grip: A grip that forces the wrist back can make the start position difficult to control. Choose the hold that feels secure and keeps your wrist aligned with your forearm.
An arched lower back: Ribs that flare and a back that arches may signal that you’re crowded or not braced. Recheck your distance, bring your ribs over your hips and engage the kneeling-side glute lightly.
Too little tension: The half-kneeling stance offers less support than standing on both feet. Before the first repetition, establish contact through the front foot, steady the hips and trunk, and grip the bar firmly.
Small adjustments may take a few tries, and your preferred setup may differ from someone else’s. Use comfort, control and a stable, upright position to guide the choice. If a position causes pain or you’re unsure how to adapt the movement to an injury or health concern, ask a qualified health professional for guidance.